Running popunder ads without testing can turn into a mess with overdrawing budget and getting no conversions. But how to test popunders the right way? Can beginners do it and not get into pitfalls?
In this article you will get a detailed guide on testing popunder ads and getting results the high profit can be built on!
We will share useful tips on testing popunder ads, including offer choice, landing pages break-down, setting up campaign’s parameters, conversion tracking and results evaluation!
Why you should run tests on popunder ads?
Popunder traffic (presented in ad formats as pop ads, clickunder, on-click ads, popunder and popup ad) is a type of paid advertisement that shows up in pop-ups in a new browser window beneath the current tab of the active website. This form of advertising is known for its high viewability, which can be attributed to the fact that it shows a full-page ad once the user closes his active window or tab.
Also pop ads contain huge volumes of traffic worldwide, which are quite hard to handle and require a careful research before a full commitment to the advertising. As there’s no way to determine socio-demographic options in targeting via pops traffic, so you have to be careful in getting to the right audience, hence testing your approaches.
Below you will find a five step guide on popunder advertising tests, which will consist of offer peculiarities, landing pages, setting up campaign’s parameters, conversion tracking and results analysis!
Step 1. Test an offer that accepts popunder traffic
Not all offers accept popunder traffic, so to avoid getting blacklisted by an advertiser, make sure you follow the offer’s requirements. If you’re working with an affiliate network, you should reach out to your account manager and inquire about offers that perform well that also accept pop traffic.
Below you will find a list of the best verticals for popunders, so if you don’t know where to start off, you might want to consider them. The top niches for pop ads change periodically, but the main tendencies remain.
The best performing verticals for popunders:
- Gambling;
- Betting;
- Finance;
- E-Commerce;
- Media;
- Utilities (Antivirus, VPN).
We share a regular monthly report on the most profitable geos and verticals for ad formats at RichAds, including popunders. Follow our tag “Best geos and verticals” to be up-to-date on what’s trending to advertise!
Step 2. Create landing and pre-landing pages to test popunder ads
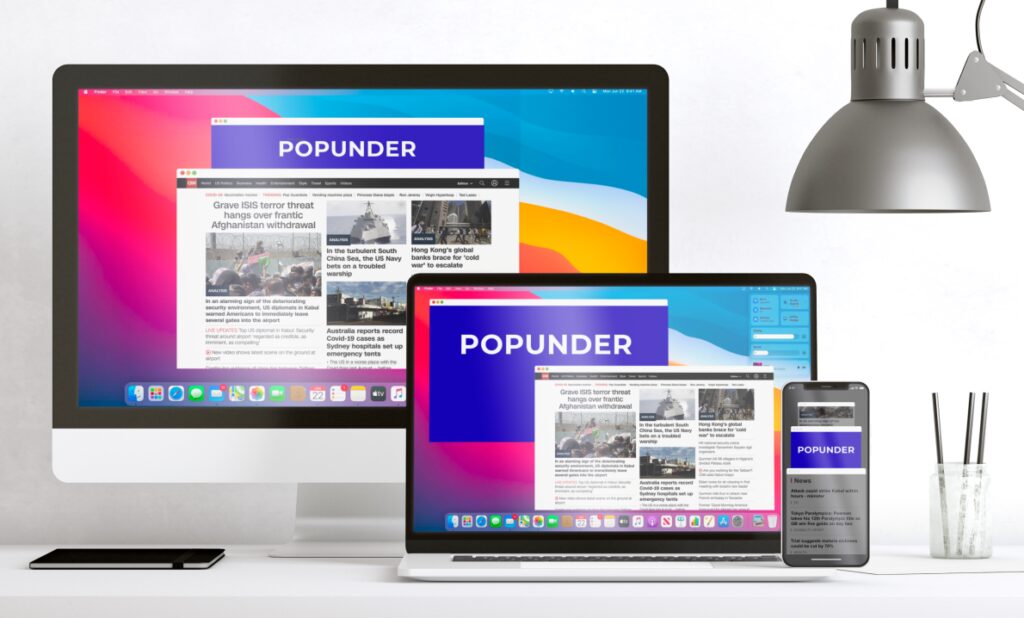
For popunder you don’t need various banners and other creatives, as the only one required is a landing page. While you always have the option to redirect viewers straight to the offer page, it would still be best to use a pre-lander. Pre-landing pages are to warm up the audiences and filter out those who have no interest in the offer at all.
Coding a landing page can be a bit tough, so instead of creating one from scratch yourself, you can utilize a done-for-you landing page builder. One of the favourites is PureLander. The platform has prebuilt templates that you can modify to match the offer. You can simply choose one, modify it according to your offer, add links, then download the landing page. Finally, upload your finished landing page to your hosting, and it’s ready for use.

What landing pages to test on popunders?
The style of your pre-lander would depend on the offer’s niche, but an absolute go-to style is the Survey Pre-lander. This gives user the time to get warmed up to the offer and increases the chances of conversion.
Here are examples of what popunder survey pre-landers for Finance and Sweepstakes verticals might look like:
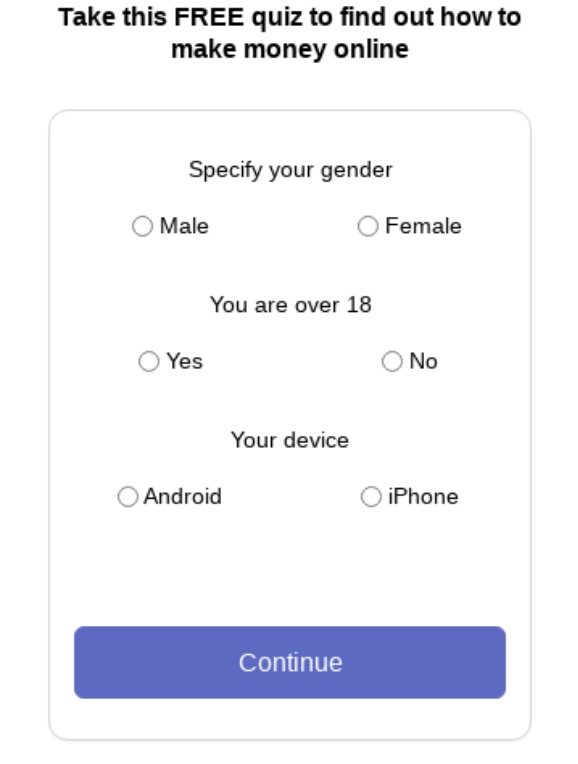
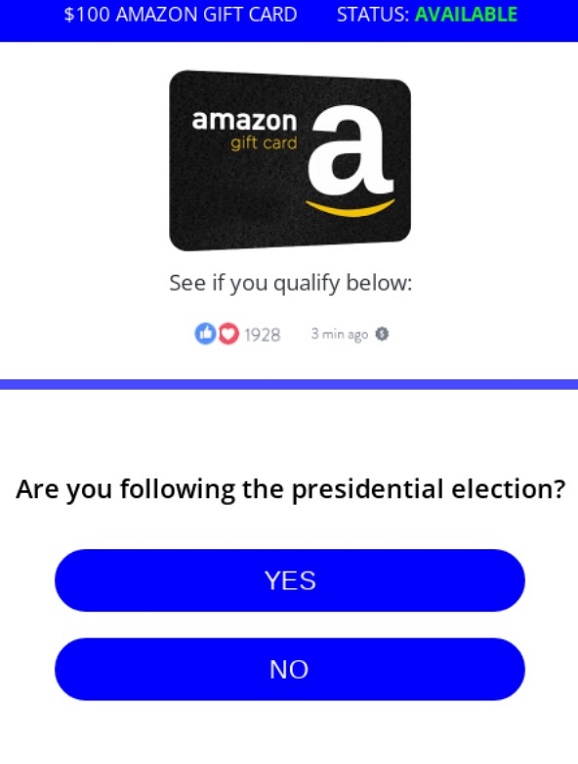
But for some verticals you might want to test other pre-landing pages with different setups. For example, Gambling niche offers favour a pre landing with a “free-spin wheel” that gives bonuses or other prizes to users upon registration. This approach highlights the main strivings exactly for the audience of online casinos and sportsbooks, as warming up the courage and passion.
Here’s what a popunder pre-landing page for Gambling vertical might look like:

Tips on testing pre-landing pages on popunders
Despite the fact that the main advertising value contains in the offer that is shown directly via landing page, pay attention to the pre-landers as well! Such engagement with the audience provides highly profitable benefits as user loyalty, nativity in sorting out the traffic and driven users ready for the offer.
Tips on popunder pre-landing and landing pages:
- Make sure the page is properly translated and has all the popular payment methods in the region;
- Check if the page loads in <1 second and weights <200Kb as users won’t wait for the ad to show;
- Connect VPS or CDN (like Cloudflare) to establish a better loading speed for the page and increase chances of users seeing the ad.
Step 3. Set up campaign filters while testing pop ads
When testing popunder ads, it’s important to immediately take precautions towards filtering and segmenting campaigns. Popunder has huge volumes of traffic — you wouldn’t want to burn all your budget because you ran pop ads prematurely. If done incorrectly, you can burn hundreds of dollars in just a few minutes.
Here are some of the filters you should set up properly:
1. Country or region
Narrowing down the traffic based on location is a fundamental step. Usually, offers already focus on specific countries. Even if the offer can be run worldwide, that doesn’t mean that you should accept worldwide gathered traffic in one campaign. Choose a certain location and focus on it during the advertising, as it will show more consistent results for your tests.
But if you want to run traffic to an offer from multiple countries, then you can create separate campaigns and run the same offer to each of the needed geos.
2. Device segmentation
Desktop traffic and mobile traffic for popunder ads differ a lot, since the CPM bids will vary, as well as traffic volume per the geo and landing formats.
We recommend to separate popunder campaigns on desktop and mobile devices, and focus on the one set in the campaign. That will show more vivid results on the tests for each run device without the need to separate them afterwards.
3. Visit frequency
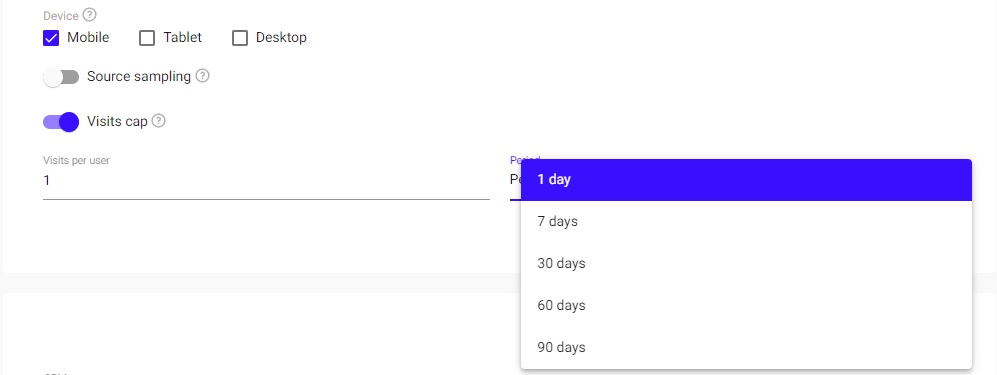
It is essential that you limit the number of times a user views your ad. This way, they won’t feel irritated by the number of times they see the ad, and you won’t waste your money showing ads to the same people that are not interested in your offer.
With popunder, a good viewing frequency would be one to three views per day.
4. Source quality
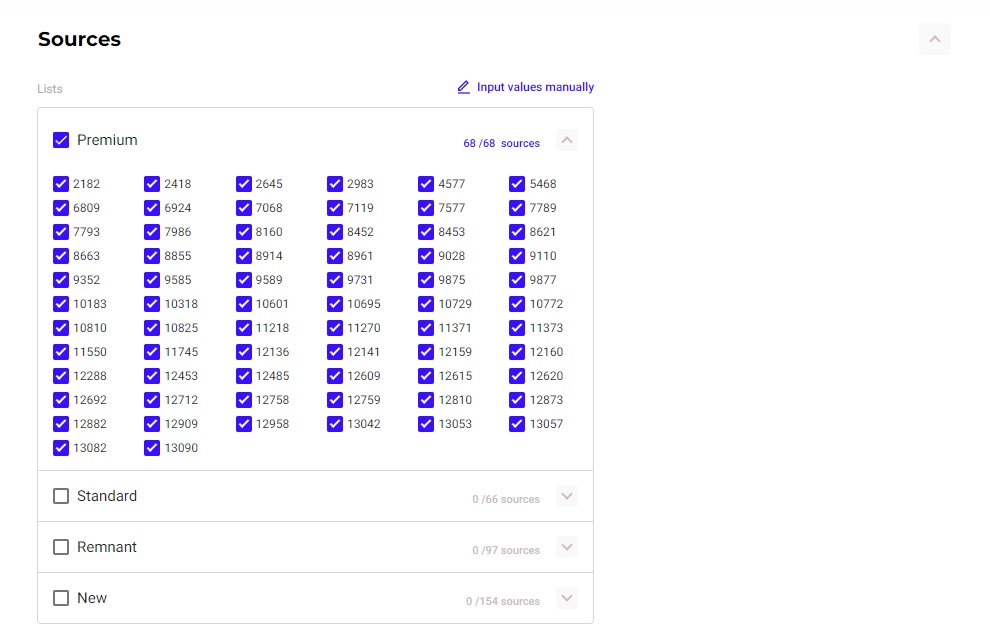
In RichAds ad network, for example, there are four different source options based on traffic quality. These are Premium, Standard, Remnant, and New. In Premium there are already tested sources with the best performance on any niche, Standard contains the normal performing sources and best to scale, while Remnant provides cheap left-over sources, and in New there are lists added up to 30 days ago.
Obviously, if you want your campaign to have a fighting chance, you’d have to choose Premium to start off with. You can go for Standard if you’d like to scale (in the affiliate scenario, scale means to explore more traffic for a good-performing campaign).
5. Other filters
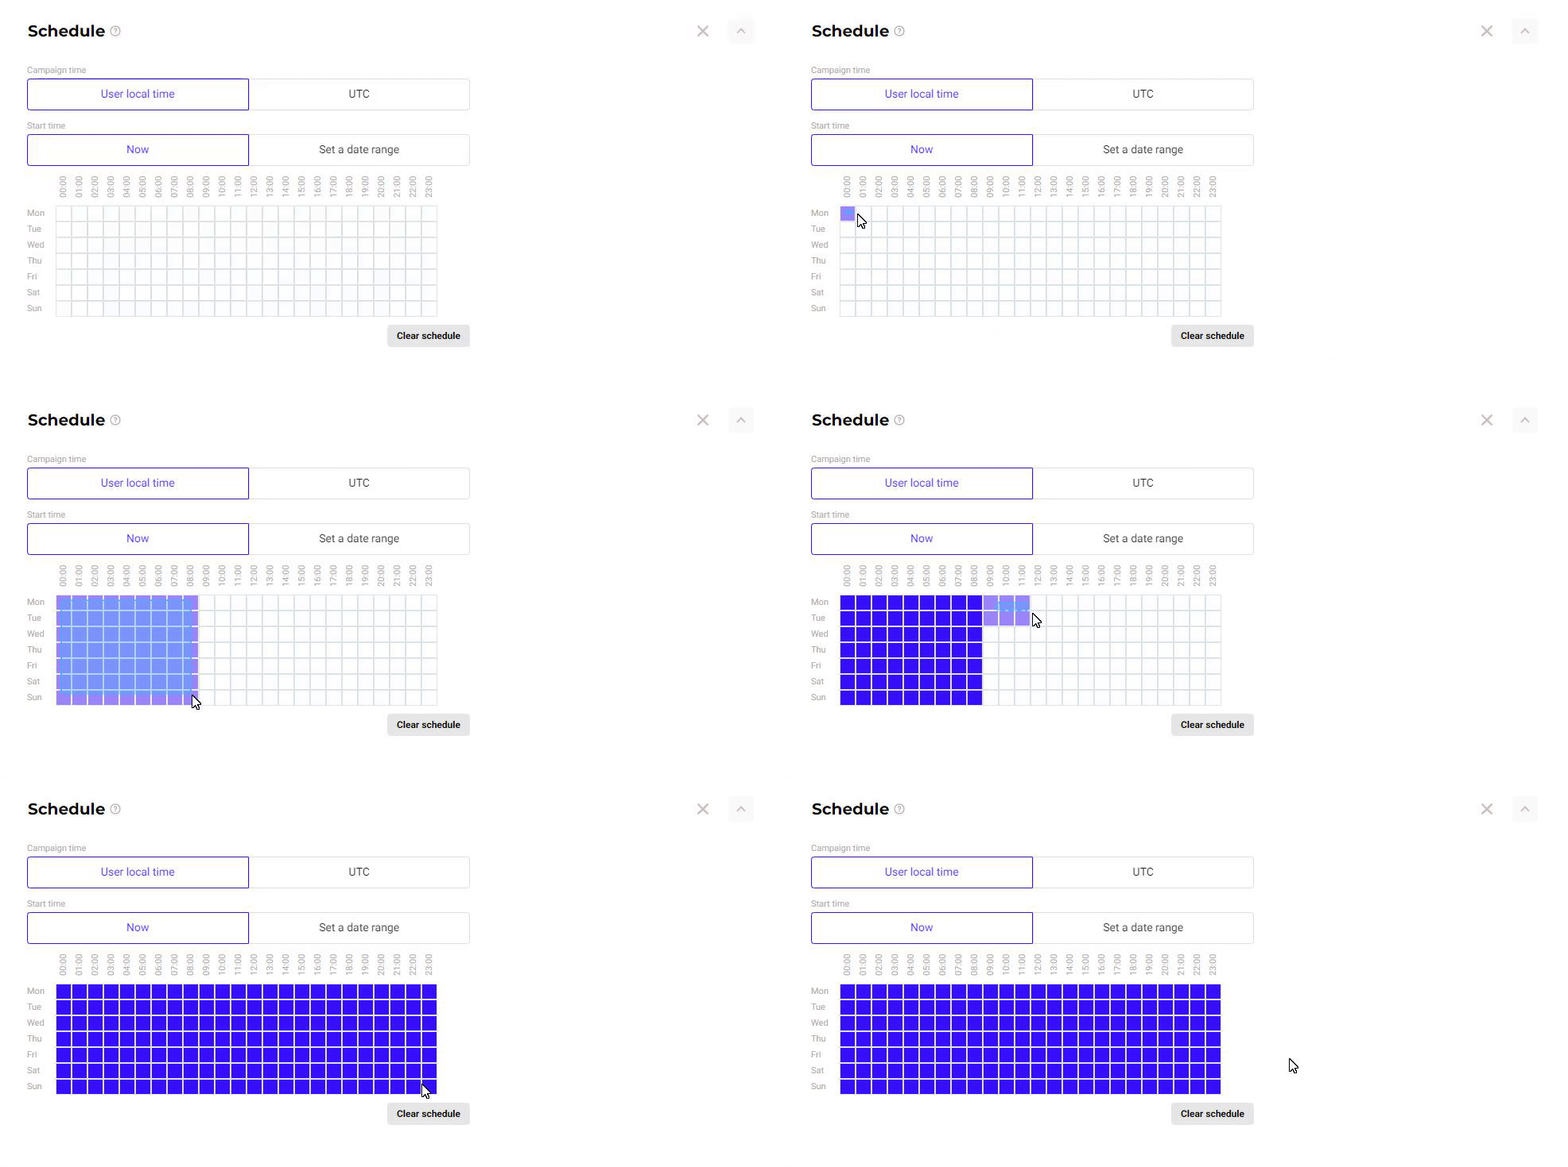
There are also other filters available to help you narrow down even further, although it is suggested not touching them when testing popunder ads. You don’t want to narrow down too fast while you’re still in the testing phase to the point that you won’t receive enough traffic. Also, your results can become inconclusive.
For example, we’ve known a case when it occurred that a Gambling offer on Norway was actively gaining audience in the early morning, before people were getting off to work. That became possible to know only because the scheduling of the ad campaign was not touched and it ran 24/7.
Warning!
If the offer requires a call-center assistance as, for example, sometimes needed for Nutra offers, do find out the working hours of the contact center and select the schedule by it. That is needed to filter the schedule by matching the appropriate response from the sales team.
Step 4. Set up conversion tracking to improve popunder tests
Apart from granting access to automatic optimization features, such as Target CPA optimization flow to run within the desired CPA at RichAds platform, conversion tracking can help you in analysis of the test results. Trackers can gather data on campaigns, monitoring which campaigns, source groups, publishers, landing pages, ad creatives, and others are delivering the best.
You can set up conversion tracking as via built-in solutions in an ad network, or by connecting it with third-party trackers. After integration, testing popunders along with examining the results is much more effective and will give you a bigger picture on adjusting campaigns’ parameters for the better!

Step 5. Evaluate results of the popunder ad testing
You don’t have to watch your campaigns non-stop, but wait for a day or two after receiving traffic before optimizing. Just check in from time to time to make sure your budget is not being spent too quickly. Once you’ve received enough traffic, you can start looking into the campaign’s stats to see the performance of websites and publishers.
For low-paying offers, we recommend pausing publisher IDs or websites after they’ve spent twice the offer’s payout and have not delivered any conversion. For high-paying offers? Well, that’s a little more complicated, so it should not be used to test popunder traffic. You can run high-paying offers in popunder traffic once you’ve already become a bit more experienced with this ad format.
As for source IDs that deliver conversions, you can increase their bids with Micro bidding feature that allows setting custom CPM for parameters. Or you can whitelist them to increase chances from getting more conversions from already well-performing source. You can later run a separate campaign using only whitelisted sources but only do that once you’ve received enough conversions for that source.
When should you stop the popunder test?
That’s a really good question! How do you know when enough is enough?
If the campaign hasn’t reached conversions at all, then you might stop testing the popunder after it’s reached 10 up to 20 times the offer’s payout.
If it has delivered some conversions, you might do any of the following:
- Create a new campaign using whitelisted sources;
- Test a new ad creative or landing page;
- Continue running the same campaign with underperforming sources blacklisted and good performing ones set with higher bids.
Conclusion
Testing popunder ads might seem a very busy process, since you need to make a thorough preparation along with a careful research. Some might want to give up on that and address an agency of some sort that do such things for you, but in fact only you can determine the right way your campaigns should be tested. These five steps should be enough to start testing advertising on popunder and get results you’d benefit off!
We at RichAds approve of getting to popunder advertising with an effort, and have been working with popunder traffic for many years! At RichAds you can launch a pop ads campaign on over 220 geos from Tier 3 to Tier 1, and all popular niches. Run profitable popunder campaigns with quality traffic by RichAds!
What is RichAds?
🔝 High quality push and pop ads,
🔼 domain redirect and native traffic source,
🔝 buy push ads at $0.005 (CPC), pop ads at $0.5 (CPM),
⏫ domain ads costs start from $1.5 (CPM), native ads — from $0.001 (CPC),
⏫ ad network offers large volumes of traffic in more than 200 geos from Tier 3 to Tier 1.


